Key Takeaways
PIP rubber installation San Diego is typically completed in phases—site evaluation and base prep, an impact-attenuating layer, then an EPDM wear layer—because most performance issues trace back to moisture, base movement, or rushed cure times. Costs vary widely and are best compared by looking at thickness needs, substrate prep scope, drainage details, and jobsite logistics rather than a single per-square-foot number.
- Base prep and drainage drive performance: The project typically includes removing or stabilizing existing surfacing, repairing cracks/low spots, and shaping drainage because movement, contamination, or moisture pathways can lead to delamination, cracking, or ponding.
- Thickness planning is a major cost and safety factor: Required depth varies by equipment fall-height zones, so bids should clarify how thickness transitions, terminations around posts/footings, and depth checks will be laid out and verified during placement.
- San Diego microclimates affect cure and scheduling: Coastal marine layer and dew can leave substrates damp while inland heat can shorten working time, so reputable installers plan weather windows, manage irrigation, and protect uncured material from moisture, debris, and early foot traffic.
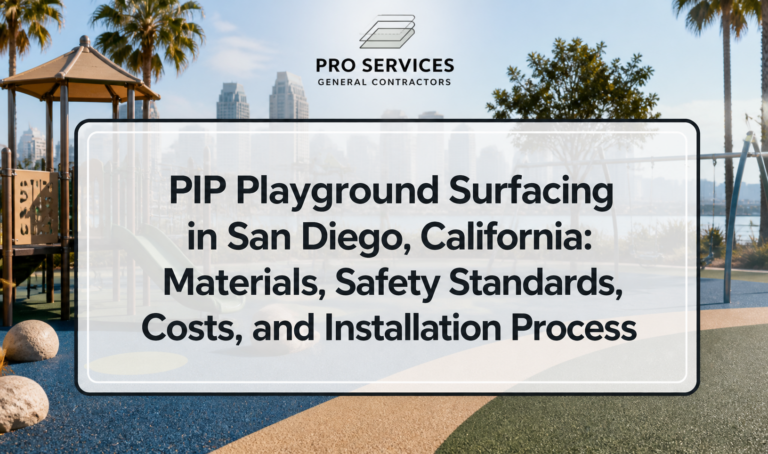
PIP rubber installation San Diego typically involves removing or stabilizing the existing playground surface, installing an impact-attenuating base layer, and applying a poured-in-place rubber wear layer that cures into a seamless, slip-resistant surface. Costs vary widely based on area size, thickness needed for fall-height requirements, site access, drainage conditions, and the amount of demolition or concrete/asphalt prep required.
In San Diego’s coastal and inland microclimates, substrate moisture, UV exposure, and temperature during installation can affect curing and long-term performance, so contractors usually plan around weather windows and verify base conditions before pouring. Proper installation also depends on meeting playground safety and accessibility expectations, which often requires documenting depth, edge transitions, and drainage details during the build.
This guide breaks down the typical installation process, common cost drivers, and what to look for when vetting contractors—such as experience with poured-in-place systems, jobsite safety practices, and the ability to coordinate inspections or compliance documentation when a project requires it.
How PIP rubber installation works (step-by-step)
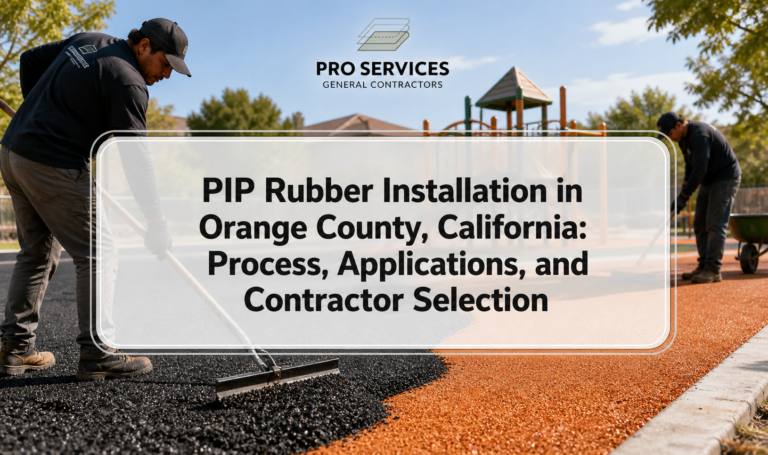
PIP rubber installation in San Diego is usually completed in phases: evaluate and prep the base, install an impact-attenuating layer, then install a wear layer and detail edges/striping. The sequence matters because most performance issues trace back to moisture, base movement, or rushed cure times.
1) Site evaluation and planning
A good scope starts with measuring the area, confirming drainage, and verifying the required shock attenuation based on equipment fall heights. This is also where access constraints and scheduling around school, park, or HOA operations get resolved.
Contractors commonly gather the following before pricing or mobilizing:
- Square footage and layout (including ramps, edges, and paths)
- Existing substrate type (asphalt, concrete, compacted aggregate, older rubber, or mixed)
- Drainage approach (slope, collection points, and any known ponding locations)
- Play equipment layout and approximate fall-height needs (to determine thickness zones)
- Site access for demolition, material staging, and mixer/crew movement
2) Demolition or stabilization of the existing surface
Some projects require full removal of damaged surfacing, while others can be stabilized if the base is structurally sound and compatible. The goal is to eliminate movement, contamination, and moisture pathways that can lead to delamination or cracking.
Common prep scenarios include:
- Removing loose tiles, turf, or failed rubber layers
- Grinding or shot-blasting concrete/asphalt to improve adhesion where required
- Repairing cracks, spalls, birdbaths, or soft spots that would “telegraph” through the rubber
- Installing or adjusting edging/containment (curbs, metal/plastic edging, or transitions)
3) Base preparation and drainage shaping
Poured-in-place rubber performs best over a stable, well-draining substrate with consistent slope. In San Diego, drainage planning is especially important because intermittent heavy rains can expose low spots that might not appear during dry months.
Depending on site conditions, base work may involve:
- Regrading and compacting aggregate to reduce settlement risk
- Verifying slope away from buildings and toward designed drainage points
- Addressing irrigation overspray or runoff patterns that keep the substrate wet
- Confirming that edges and transitions won’t trap water along borders
4) Installing the impact-attenuating “base” layer
The lower layer is built for shock absorption and thickness control, typically using larger rubber granules bound with a polyurethane binder. Thickness may vary across the playground to align with equipment fall zones.
Installation quality depends on:
- Consistent mixing ratios (rubber to binder) to prevent crumbly or overly rigid areas
- Uniform depth checks during placement
- Clean seams between pours so transitions don’t become weak points
- Careful compaction/troweling to minimize voids
5) Installing the wear layer (top coat)
The wear layer is the visible surface, commonly made with smaller EPDM granules for color and texture. This layer provides slip resistance, UV stability (depending on material selection), and the finished look of the play area.
Details that affect appearance and longevity include:
- Color blending consistency from batch to batch
- Clean, sharp geometry for graphics and game striping
- Proper edge detailing at curbs, ramps, and equipment footings
- Protection from debris, sprinklers, and foot traffic during cure
6) Curing, punch list, and closeout documentation
PIP needs adequate cure time before reopening, and cure conditions can vary with coastal humidity, morning marine layer, and inland heat. Closeout often includes walkthrough repairs, edge touch-ups, and documentation if inspections or compliance records are required.
Useful closeout items to request:
- As-built notes for thickness zones and transitions (when applicable)
- Maintenance guidelines and cleaning recommendations
- Care instructions for early use (furniture legs, carts, sports use, etc.)
Key cost drivers for PIP rubber installation in San Diego
PIP rubber installation costs can vary significantly because every site has different base conditions, access, and thickness requirements. Understanding the main drivers helps you compare bids more accurately than focusing on a single “per square foot” number.
Area size and layout complexity
Larger, open rectangles are generally more efficient to install than tight, segmented areas with many curves. Intricate shapes, multiple colors, and inlaid graphics increase labor and can increase waste.
- Simple layouts: fewer seams, faster production
- Complex layouts: more hand detail, slower pacing, more edge work
- Multi-color designs: additional mobilization time and batching control
Thickness requirements and fall-height zones
Thickness is one of the biggest material cost factors because more rubber and binder are needed as depth increases. Many playgrounds also require different thicknesses in different zones, which adds layout, depth verification, and installation time.
If you’re comparing quotes, ask how the contractor is accounting for:
- Thickness transitions between zones
- Equipment footings or surfacing terminations around posts
- Any changes to equipment that might alter fall-height needs
Substrate condition and prep scope
Base repairs can range from minor patching to full replacement of asphalt/concrete or aggregate base reconstruction. If one bid includes comprehensive prep and another assumes minimal prep, the cheaper number may not hold up once demolition starts.
- Crack repairs and patching
- Grinding/cleaning to improve adhesion
- Moisture mitigation steps (site-specific)
- Edge containment, ramps, and trip-hazard corrections
Access, staging, and jobsite logistics
San Diego sites often have access constraints—gated courtyards, rooftop podiums, narrow pathways, or school campuses with limited delivery windows. More complicated access can increase labor and extend the schedule.
- Distance from truck drop-off to pour area
- Staging space for materials and mixing
- Noise/time restrictions near schools or residences
- Protection of adjacent landscaping, irrigation, or finished hardscape
Weather windows and microclimate impacts
Marine layer moisture, overnight dew, and inland heat can influence how materials handle during mixing, placement, and curing. Reputable installers plan pour windows and may pause work if conditions risk adhesion or finish quality.
Situations that can slow or complicate installation include:
- High humidity or damp substrates that can interfere with bonding
- Direct sun and high surface temperatures that reduce working time
- Windblown debris (sand, dust, leaves) that can contaminate the wear layer
PIP rubber vs other playground surfacing options (practical comparison)
Poured-in-place rubber is valued for seamless accessibility and design flexibility, but it’s not the only surface used in San Diego. A quick comparison can help confirm whether PIP fits your priorities for maintenance, drainage, and appearance.
| Surface Type / Factor | What to Expect | San Diego Site Considerations |
|---|---|---|
| Poured-in-place (PIP) rubber | Seamless surface with an impact-attenuating base layer and an EPDM wear layer; supports graphics and smooth transitions. | Moisture control and substrate prep are critical due to marine layer/dew; plan pours around weather windows and irrigation schedules. |
| Engineered wood fiber (EWF) | Loose-fill natural look; requires routine raking and replenishment to maintain depth and accessibility. | Can migrate during heavy rain events; drainage and containment borders matter to reduce washout and bare spots. |
| Rubber tiles | Modular system; repairs can be localized by replacing tiles, but seams are present. | Edge curl and seam separation are common concerns when substrates move or water intrudes; good base flatness is important. |
| Synthetic turf with shock pad | Green play aesthetic; often uses an underlayment and requires attention to seams, infill (if used), and drainage. | Heat and UV exposure can be a consideration in inland areas; choose drainage details carefully for winter storms. |
| Sand / pea gravel (where allowed) | Loose-fill options can be lower upfront but require frequent grooming and depth checks. | Can track into adjacent hardscape and drains; may be less compatible with accessibility goals without careful design. |
If you want a broader overview of surface categories and typical use cases, you can also reference playground surfacing as a starting point, then confirm specifics with your local inspector and installer.
What to look for when vetting a PIP rubber installer
The best outcomes usually come from contractors who treat PIP as a system: base prep, moisture control, thickness verification, and detailing. Vetting should focus on process transparency and quality controls—not just color samples.
Experience with poured systems and similar sites
San Diego projects range from beach-adjacent parks to inland campuses with extreme heat swings. Ask for examples that match your conditions—schools, municipal parks, HOAs, rooftops, or splash pad perimeters.
- Have they installed PIP over the same substrate you have (asphalt vs concrete vs aggregate)?
- Do they handle complex edges, ramps, and accessible transitions cleanly?
- Can they coordinate around active facilities (school hours, park closures, HOA rules)?
Written scope for base prep and repairs
Many disputes come from vague prep language. A clear scope should identify what’s included, what’s excluded, and how hidden conditions (soft base, excessive cracking, unknown layers) will be handled if discovered.
- Define demolition limits and disposal
- Specify crack/patch repair method and materials
- Clarify whether drainage corrections are included
- List edge details and transitions (curbs, ramps, borders)
Thickness verification approach
Because thickness is closely tied to impact attenuation, installers should be able to explain how they lay out depth zones and verify install depth during placement. If a proposal doesn’t mention thickness checks at all, request clarification before signing.
Jobsite safety and facility protection
PIP work involves mixers, binders, and tools that require controlled access. For schools, childcare, and public parks, it’s also important to plan pedestrian detours and protect adjacent finishes from spills or tracking.
- Perimeter control and signage during cure
- Protection for sidewalks, stairs, and entry points
- Coordination for deliveries and staging
San Diego-specific installation challenges (and how they’re handled)
Local climate and site types influence how a PIP project should be sequenced. Planning for moisture, UV exposure, and substrate movement helps avoid premature wear, seam visibility, or adhesion problems.
Coastal moisture and morning marine layer
Near the coast, elevated humidity and morning condensation can leave substrates damp even when there’s no rain. Installers often schedule pours later in the day once surfaces dry and may verify conditions before priming or placing material.
- Limit irrigation before and during installation
- Check shaded zones that dry slower than sunny areas
- Protect uncured material from fog/dew overnight when possible
Inland heat and rapid set times
Inland neighborhoods can see much higher daytime temperatures, which can shorten working time and make finish consistency harder. Experienced crews plan smaller batches, shade materials when feasible, and adjust workflow so the wear layer remains uniform.
Drainage under intense rain events
Even in a generally dry climate, short periods of heavy rain can expose low spots and edge dams. Good designs avoid trapping water at borders and ensure slopes are meaningful without creating trip hazards.
Common installation mistakes to avoid
Most premature failures come from preventable issues like poor base prep, moisture problems, or rushed detailing. Knowing what can go wrong helps you ask better questions during bidding and walkthroughs.
- Skipping substrate repairs and expecting rubber thickness to “hide” defects
- Pouring over damp or contaminated surfaces (dust, oils, overspray)
- Inconsistent mixing ratios that create soft/crumbly or overly rigid areas
- Weak edge terminations that allow water intrusion and peeling
- Reopening the area before full cure, causing dents, scuffs, or tearing
Longevity is closely tied to workmanship and realistic planning; cutting corners to reduce upfront cost can lead to more repairs later. For a broader perspective on how low-bid surfacing choices can create long-term expenses, see why cheap surfacing costs more long-term.
Maintenance expectations after installation
PIP rubber is relatively low-maintenance compared to many loose-fill options, but it’s not maintenance-free. A simple routine reduces staining, biological growth in shaded areas, and premature wear in high-traffic zones.
Routine cleaning and inspections
Light cleaning and periodic checks catch issues early, especially at seams, edges, and drainage points. The goal is to keep the surface free of grit that acts like sandpaper and to prevent water from lingering where it shouldn’t.
- Remove debris routinely (leaves, sand, wood chips from nearby landscaping)
- Rinse and gently clean spills before they set (food, drinks, sunscreen)
- Inspect edges and transitions for early lifting or cracking
- Check drainage after rain or heavy washdown to spot ponding
Plan for wear in high-use zones
Entry points, slide exits, and popular climbing areas will wear faster than perimeter zones. Budgeting for periodic localized repairs is realistic for busy parks, schools, and multi-family communities.
For maintenance planning and practical care steps, review poured-in-place rubber maintenance guidance and align it with your site’s use patterns.
Choosing the right PIP system for your site type
Different properties prioritize different outcomes—public durability, school safety scheduling, HOA aesthetics, or rooftop weight and drainage constraints. Matching the system details to the setting reduces surprises during permitting, inspection, and long-term use.
Public parks, city facilities, and schools
Public projects often need clearer documentation, tighter scheduling, and coordination with inspectors or internal stakeholders. If your project is municipal or campus-based, it helps to use a contractor familiar with these workflows.
- Phased construction to keep portions open
- Defined access routes for deliveries and safety barriers
- Clear closeout documentation and punch-list process
HOAs, apartments, and community play areas
HOA sites tend to value aesthetics, quiet work hours, and clean transitions to adjacent walkways and landscaping. It’s also common to include small graphics, border colors, or accessibility improvements for paths and entries.
Corporate campuses and mixed-use properties
These projects often integrate branding colors, plaza aesthetics, and high foot traffic. Planning should consider carts, event loads, or adjacent hardscape details that could scuff or stain the wear layer.
Rooftops, decks, and podiums
Elevated installs may require careful coordination around waterproofing, drainage mats, and weight considerations. If you’re comparing surface types for an elevated amenity deck, rooftops, decks, and patios PIP solutions can help you frame the right questions for your design and waterproofing teams.
Plan your project with fewer surprises
The smoothest PIP rubber installation San Diego projects start with a clear scope, realistic scheduling, and detailed base preparation. When you compare proposals, focus on prep methods, thickness planning, drainage details, and cure protection—not just color options or an advertised price range.
If you want to explore system options, design flexibility, and typical build sequencing in one place, review poured in place rubber installation in San Diego to help you build a checklist before requesting bids.
Frequently Asked Questions
Get a clear scope for your San Diego PIP rubber installation
If you’re planning poured-in-place rubber for a school, park, HOA, or commercial play area, the smartest next step is confirming what your site actually needs—base prep, drainage corrections, and thickness zones based on fall-height requirements. A clear plan helps you compare bids accurately and avoid change orders tied to hidden substrate issues or access limitations.
Playground Safety Surfacing can review your layout and existing conditions so you know what questions to ask, what documentation to request, and what details matter most for long-term performance and accessibility.