
Poured Rubber vs Rubber Tiles: Best Playground Options for Safety in California
Executive Summary
Poured-in-place rubber and rubber tiles can both be a compliant, impact-attenuating playground surface in California when the system is documented to ASTM F1292 for the required fall heights and installed over a properly built, well-drained base. In practice, poured-in-place is usually the better choice for complex layouts and accessibility-sensitive transitions, while tiles often win on small, simple pads where modular replacement and speed matter most.
3 Core Insights
- Compliance is system-based, not material-based: Either poured rubber or tiles can meet ASTM F1292 and ADA-aligned usability expectations only when thickness zones, base prep, drainage, and edge/seam detailing match the equipment fall heights and real site conditions.
- Poured-in-place reduces seam-driven risk in high-mobility areas: The monolithic surface makes it easier to build flush ramps, radiused turns, and smooth transitions that minimize trip edges and support wheelchair travel near transfer platforms and entries.
- Tiles simplify targeted repairs but demand tight seam and perimeter control: Modular panels can be replaced quickly when damaged, but long-term performance depends on stable substrates, moisture-managed detailing, and preventing seam lift/curl—especially in wet coastal or irrigated environments.
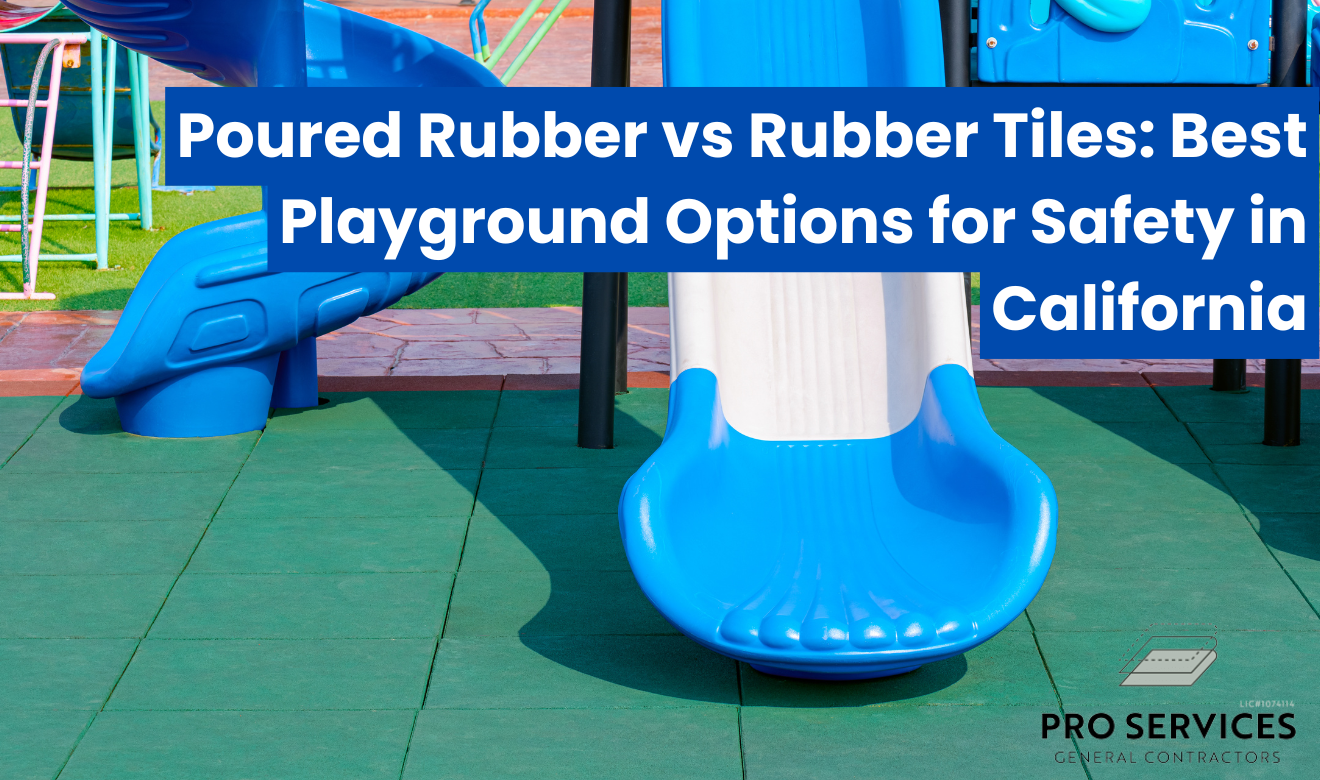
Poured-in-place rubber and rubber tiles are the two primary unitary surfacing systems used to build impact-attenuating playground ground covers in California. In a poured rubber vs rubber tiles for playground comparison, poured-in-place is a seamless, troweled surface mixed on-site, while tiles are factory-formed sections installed over a prepared base. Both options are commonly specified to reduce fall injuries on schoolyards, parks, and childcare centers in cities like Los Angeles, San Diego, San Jose, Sacramento, and Fresno. Both must be selected and installed to meet fall-height performance targets using ASTM F1292 impact testing and to support accessibility expectations under ADA-aligned route and wheelchair mobility needs. Poured-in-place can be shaped into ramps, domes, and custom radii around slides, swings, and climbers, which helps eliminate trip edges and can simplify wheelchair turns near transfer platforms. Tiles can speed up installation for smaller play pads, like under a single composite structure at an apartment community in Orange County, and allow targeted replacement if a section is damaged. California site conditions matter. Hot inland valleys can drive surface temperature concerns and binder aging, so UV-stable binders and light color choices become more important. Coastal fog and winter rain in the Bay Area can stress drainage, so a correctly graded sub-base, permeable design, and tight seam detailing become critical. Both systems depend on correct base prep, such as compacted aggregate with proper slope, stable concrete or asphalt where specified, and clean transitions at curbs, borders, and ramps to keep accessible paths smooth and code-ready.
What “Compliant” Means in California: Safety, Accessibility, and Inspections
Both poured surfacing and tiles must be chosen for the equipment’s fall heights and installed to maintain accessible routes and stable transitions. In California, “compliant” typically means documented impact performance and field conditions that support ADA-style mobility without creating trip hazards.
For most public and school sites, the decision is anchored to three practical requirements:
- Impact attenuation documentation for the intended use: verified to ASTM F1292 for the target critical fall height and maintained as the surface ages.
- Accessibility performance aligned with 2010 ADA Standards for Accessible Design (commonly used as the baseline for accessible route expectations in public facilities), including stable surfaces and smooth transitions at edges and ramps.
- Field constructability: correct base, drainage, and seam/edge detailing so the surface performs in real weather (heat, rain, coastal moisture) across cities from San Diego to Sacramento.
Playground owners should also understand the standard language used in procurement and risk management. The industry term playground surfacing describes materials selected specifically to reduce injury risk from falls, and California agencies often require submittals showing test reports, product data, and installation procedures before acceptance.
Poured-In-Place Rubber: What You’re Actually Buying
Poured-in-place (PIP) is a continuous rubber system installed on-site in lifts, typically a resilient base layer with a wear layer on top. The main value is seamless geometry—curves, ramps, and flush terminations are built into the surface instead of cut and patched later.
Key attributes that affect performance and long-term ownership:
- Seamless field: no factory seams across the play zone, which reduces edge lift points and trip lines around slide exits, swing bays, and transfer stations.
- Custom thickness by fall zone: installers can vary thickness around higher fall-height components if the specification allows staged depths.
- Design flexibility: color fields, graphics, domes, and ramps can be integrated to support wayfinding and accessible circulation.
Because it’s installed in place, PIP quality is tightly tied to contractor procedure: mix ratios, ambient conditions, cure time, and substrate prep. For many sites, choosing a dedicated poured-in-place rubber installation scope (with documented base requirements and acceptance checks) is the most direct way to control outcomes like delamination, premature cracking, or surface raveling.
Rubber Tiles: What You’re Actually Buying
Rubber tiles are pre-manufactured panels adhered or mechanically secured over a prepared base. Their value is modularity—predictable unit thickness, controlled factory production, and replaceable sections when localized damage occurs.
Tiles are often selected when project conditions favor quick installation or when the play area footprint is compact and geometrically simple. Typical characteristics include:
- Modular replacement: damaged tiles can be swapped without demolishing the full play pad.
- Controlled manufacturing: tile density and thickness are factory-established, which can reduce variability compared to on-site mixing.
- Edge and seam management: the system’s success depends on adhesion, seam tightness, and perimeter restraint to prevent curl and water intrusion.
Where tiles can struggle is at complex curves, tight radii around footings, and transitions that must be flush for wheeled access. Those details are solvable, but they require careful layout, trimming, and edge protection.
Impact Attenuation: ASTM F1292 and the Fall-Height Reality
Impact compliance is not a “material choice” alone—it’s a thickness-and-system design choice verified by testing. ASTM F1292 is the primary test method used to document impact attenuation for playground surfacing under and around equipment.
Practical implications for project planning in California:
- Start with the equipment’s maximum fall height (often provided by the playground manufacturer). Your surfacing submittal should match that height for the exact system build-up.
- Don’t assume uniform thickness equals uniform protection: swings, overhead events, and climbers concentrate impact risk in specific zones; ensure the surfacing design matches those zones.
- Plan for aging: UV exposure and binder oxidation can reduce performance over time; public owners often request maintenance plans and periodic evaluations.
If a jurisdiction asks for “proof,” that typically means receiving a test report showing the system and thickness were tested to ASTM F1292 and meet the intended critical fall height. Keep those records with closeout documents for risk management and future renovations.
Accessibility and Usability: How Each Surface Supports ADA-Aligned Routes
Seamless travel and flush transitions are the daily test of an accessible play area, not just paperwork. PIP and tiles can both support wheelchair and mobility-device use when installed over a stable, correctly graded base with tight edge detailing.
What owners, inspectors, and designers focus on most:
- Vertical changes at transitions: entrances from sidewalk/curb, ramp landings, and edges at borders must remain smooth and non-trip.
- Stability under turning and braking: transfer platform approaches and turning areas need a firm, stable surface that does not shift or rut.
- Drainage without ponding: standing water at access routes becomes a usability barrier and accelerates wear.
PIP typically makes it easier to create continuous ramps and radiused turns without seam edges. Tiles can work well for accessible travel when seams remain tight and the perimeter is restrained, but it requires ongoing monitoring for curl or adhesive failure—especially where wheel traffic repeatedly pivots.
Base Preparation and Drainage: The Factor That Decides Success or Failure
Most premature failures trace back to substrate and water management, not the rubber itself. California’s rain events, irrigation overspray, and coastal moisture make slope, compaction, and drainage detailing non-negotiable.
For both systems, the base must be built to the manufacturer’s published requirements and commonly includes one of the following approaches:
- Compacted aggregate base (often used for porous/permeable rubber concepts): requires correct gradation, compaction, and consistent slope so water moves away from structures and accessible entries.
- Concrete or asphalt substrate (common beneath tiles and some PIP designs): provides a stable plane for adhesion and reduces settlement risk, but must be properly sloped and drained.
Drainage detailing that affects inspections and longevity:
- Positive slope to drain water away from equipment footings and toward approved outlets or permeable zones.
- Perimeter restraint at borders, curbs, and ramps to prevent edge migration and cracking.
- Seam sealing/adhesion strategy (especially for tiles) to reduce water intrusion that can freeze-thaw in colder inland regions or degrade adhesive bonds.
Heat, UV, and Coastal Moisture: California Climate Tradeoffs
Inland heat loads and coastal humidity drive different failure modes, so material selection must match the region. UV-stable binders and design choices that control surface temperature are not optional in hot inland valleys.
Region-specific considerations:
- Hot inland cities (e.g., Fresno, Sacramento, Inland Empire):
- Specify UV-stable binders and confirm warranty language covers UV-related wear.
- Consider lighter color blends to reduce heat absorption; dark wear layers typically run hotter in direct sun.
- Plan shading: adding overhead shade reduces heat stress and extends binder life.
- Coastal and Bay Area conditions (fog, marine layer, winter rain):
- Prioritize drainage design and moisture-tolerant adhesive/bonding procedures.
- Detail seams and perimeters to prevent moisture infiltration and edge curl.
Installation Logistics: Schedule, Disruption, and Repair Strategy
PIP is field-built and sensitive to weather windows, while tiles are modular and can be staged. Your best choice depends on how the site must operate during construction and how you plan to manage damage later.
Decision points that matter to schools, parks, and HOAs:
- Construction window:
- PIP requires on-site mixing, troweling, and cure control; rain and temperature swings can delay placement.
- Tiles can often be installed quickly on a ready substrate, but adhesive cure and seam detailing still require controlled conditions.
- Downtime tolerance:
- If a play zone must reopen fast, tiles can be advantageous for small footprints.
- For large, complex play areas, a phased PIP installation can still be planned, but requires disciplined staging and barricading.
- Repair approach:
- PIP repairs can be blended but may show patch lines depending on age and color exposure.
- Tile replacement is straightforward if matching product remains available; otherwise, color and thickness mismatches can create visible and tactile transitions.
Side-by-Side Specification Snapshot (California-Oriented)
This table summarizes the practical specification items that typically drive approvals, safety documentation, and field performance. Use it as a checklist when reviewing submittals, not as a substitute for the manufacturer’s written requirements.
| Feature / Metric | Specifications | Local Guidelines |
|---|---|---|
| Impact attenuation verification | Provide documentation demonstrating compliance with ASTM F1292 for the specified critical fall height (system + thickness). | Public agencies and school districts commonly require submittals/test reports during plan review and closeout for risk control. |
| Seams and trip edges | PIP: monolithic field with tooled terminations; Tiles: manage panel seams, adhesive coverage, and perimeter restraint to prevent curl. | Inspectors typically flag lifted edges at borders and entries because they affect accessible travel and maintenance liability. |
| Substrate and drainage | Base must be stable, correctly sloped, and built to manufacturer requirements; drainage must prevent ponding. | Coastal moisture and winter rain elevate the importance of slope, drains, and seam detailing to avoid trapped water under surfacing. |
| Repair and lifecycle management | PIP repairs are field patches; tiles allow modular replacement if matching inventory exists and the base remains intact. | For public parks, plan procurement so replacement material can be sourced later; document product line and color mix in closeout files. |
| Heat/UV durability controls | Select UV-stable binders and consider lighter wear-layer colors; ensure cleaning/maintenance methods are compatible with binder. | Inland heat zones benefit from shade planning; adding shade can improve usability and reduce thermal stress on surfacing. |
Cost Drivers You Can Control Without Guesswork
Total cost is driven less by “poured versus tile” and more by fall-height thickness, base scope, drainage work, and edge conditions. The most reliable way to manage budget is to control variables that trigger change orders: demolition, grading, and transitions.
Use these levers to keep bids comparable:
- Specify the fall heights and required thickness zones clearly in plan notes and surfacing schedules.
- Define the substrate (aggregate base vs asphalt vs concrete), including slope and drainage intent.
- Detail borders and terminations at curbs, ramps, and adjoining sidewalks to eliminate ambiguous edge conditions.
- Require submittals: ASTM F1292 documentation, product data, installation method, and a maintenance plan.
If you are comparing alternate materials across a site (for example, rubber surfacing near equipment and turf in adjacent areas), lifecycle thinking matters as much as first cost. A useful perspective on long-term ownership is covered here: why cheap surfacing costs more long term.
Selection Checklist: When Poured Rubber Is the Better Choice vs When Tiles Win
The best system is the one that matches geometry, maintenance capacity, and climate exposure while meeting verified impact targets. Use these selection triggers to decide quickly and defensibly during design review.
Choose poured-in-place when the site has complex geometry or high accessibility sensitivity
PIP is usually the better fit for large, irregular play areas where seamless transitions reduce tripping and improve mobility. It is also preferred when you need ramps, domes, or intricate radii integrated into the play layout.
- Large schoolyard play zones with multiple fall-height areas
- Curved borders, custom graphics, and frequent wheelchair turning near transfer points
- Projects where minimizing seams is a maintenance priority
Choose tiles when modular replacement and fast installation on small pads are the priority
Tiles are often the better fit for compact play footprints and owners who want the option to replace localized damage without cutting into a monolithic surface. They can also simplify scheduling when the substrate is already in good condition.
- Small play pads (single structure, limited edges and curves)
- Sites where rapid reopening is a primary constraint
- Facilities with predictable, localized wear patterns and the ability to keep matching replacement stock
Maintenance Reality: What Owners Must Plan For
Both systems require routine cleaning, seam/edge checks, and prompt repairs to keep accessible travel smooth and to preserve impact performance. Deferred maintenance is the fastest path to trip edges, water intrusion, and premature replacement.
A practical maintenance plan should include:
- Weekly/Monthly: remove debris, check for vandalism cuts/burns, identify ponding areas after irrigation or rain.
- Quarterly: inspect edges at curbs and ramps, verify seams (tile systems), and look for wear-layer thinning in high-traffic exits.
- After storms: verify drains/outfalls, confirm no undermining or settlement at borders.
- As needed: patch damage promptly to prevent water infiltration beneath the system.
Finish Strong: A Defensible Choice for California Playgrounds
Poured-in-place rubber and rubber tiles can both deliver impact-attenuating, accessible play surfaces when the system is specified for the equipment’s fall heights and installed over a correctly built, well-drained base. The deciding factors in California are climate exposure (UV and heat vs coastal moisture), the site’s geometry and accessibility transitions, and how the owner intends to maintain and repair the surface over time.
For complex layouts and high-mobility areas, a seamless poured surface often reduces edge-related maintenance and improves wheelchair travel at turns and ramps. For smaller footprints or sites where modular replacement is operationally important, tile systems can be an efficient solution—provided seams, perimeter restraint, and drainage are executed precisely. In either case, require ASTM F1292 documentation, detail your borders and slopes, and treat base preparation as the primary performance driver rather than an afterthought.
Frequently Asked Questions
Get the Right Surfacing the First Time—Before It Turns Into a Safety, ADA, or Budget Problem
Choosing between poured-in-place rubber and rubber tiles isn’t just a “finish” decision—it’s a performance system that lives or dies by fall-height documentation, base prep, drainage, seam detailing, and climate-specific material choices. And in California, the margin for error is small: one missed slope detail can create ponding, one weak perimeter condition can curl into a trip edge, and one unverified thickness can leave you exposed when an incident happens and someone asks for ASTM F1292 proof.
When this is handled without an experienced local expert, the real operational risks show up fast: failed inspections, change orders you didn’t budget for, premature cracking or delamination, accessible route issues at entries and transitions, and repairs that never truly blend—plus the worst-case scenario of injury liability when surfacing performance can’t be documented or maintained over time.
Playground Safety Surfacing helps California schools, parks, HOAs, and childcare centers make a defensible choice with the details that actually determine success: matching the system and thickness to the equipment’s fall heights, building the base to spec, protecting edges and seams, and designing drainage so the surface performs in heat, rain, and coastal moisture—not just on day one, but year after year.
Related Posts

Poured Rubber vs Rubber Tiles for Playgrounds: Choosing the Best Option in California
Executive Summary Poured-in-place rubber is typically the best long-term choice when ADA continuity and minimal…

Expert Guide to Poured Rubber Surface Repair and Maintenance in California
Executive Summary Poured rubber surface repair and maintenance in California is successful when it restores…
Leave a Reply